How to link an estimate to a project in the Saptivo CRM system? #
- Go to Menu -> Sales -> Estimates and click ‘Create New Estimate.’
- Select a customer.
- A drop-down with projects will be shown below the customer select field (if no projects are associated with the selected customer, the dropdown with projects won’t be shown).
- Select the project.
- Configure the estimate to fit your needs.
- Save the estimate.
Navigate to the project area and click on the tab ‘Sales -> Estimates.’ You will be able to see the newly created estimate associated with your selected project.

How to send an estimate to an email in the CRM system? #
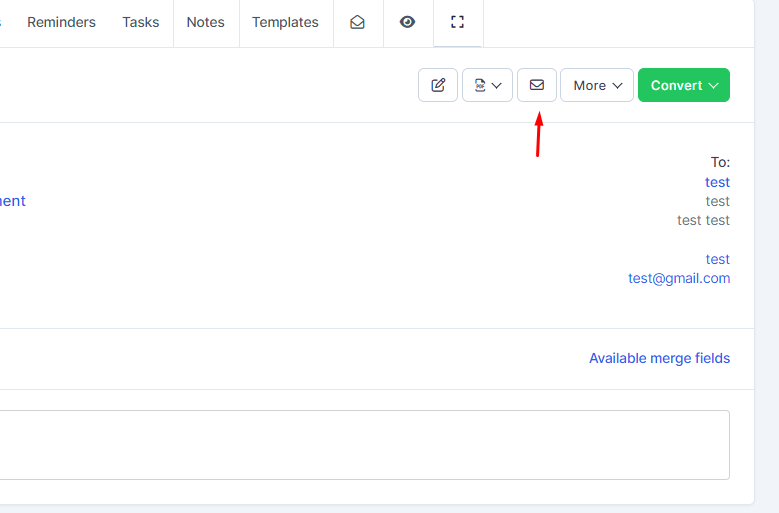
Saptivo has the option to send this estimate to the related customer. Also, the PDF estimate will be attached to the email. If you do not want to attach the PDF estimate, simply uncheck the checkbox ‘Attach Estimate PDF.

After sending the estimate to the customer, if you want to send it again, there will be another email content. Because the initial estimate has already been sent, the customer may want the estimate again, and in all cases, this content will be different. Go to Setup -> Email Templates -> Estimate Already Sent to Client to edit the email content when sending the estimate to your customer for the second time.
By default, all contacts with permission for estimates will be selected, and you can adjust this to your needs.
How to convert an estimate to an invoice in the Saptivo CRM system? #
You can easily convert the estimate to an invoice from the admin area.
Open the estimate you want to convert, and on the right side, click ‘Convert to Invoice.

How to create a new estimate in our CRM system? #
To create a new estimate, go to Sales -> Estimates -> Create New Estimate or click on the Build icon on the top left side and select Create Estimate.

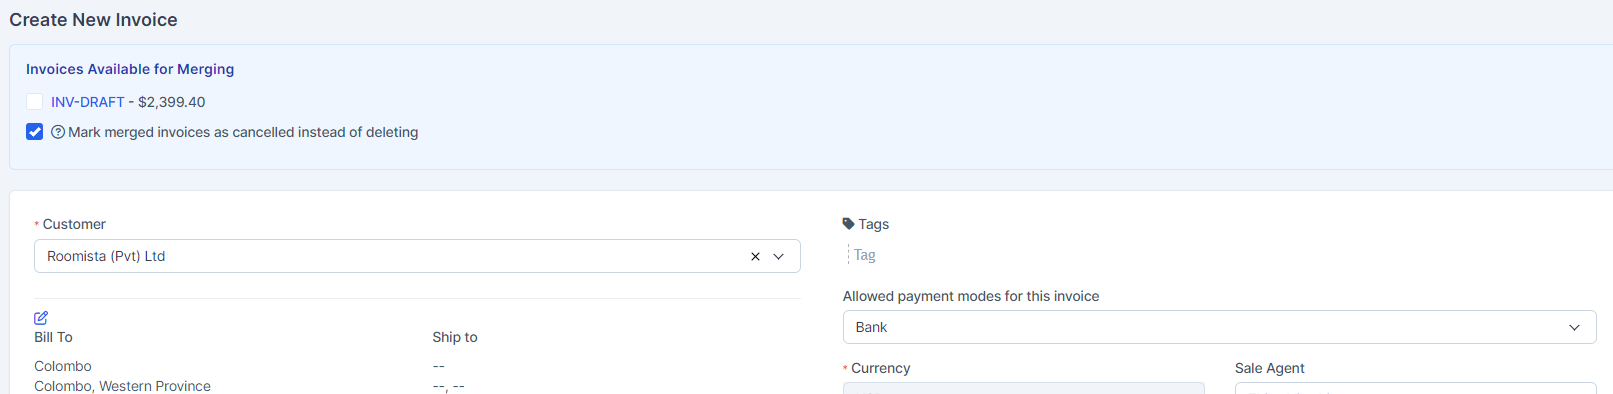
Client – Before selecting a client, you must have added clients in Customers -> New Customer. When selecting a customer, the customer information will be fetched directly from the customer profile you created. Alternatively, you can click on the edit icon and directly add the desired customer information; this also applies to billing information, which is fetched when selecting a customer.
Note: If you want the billing details to be auto-populated when selecting the customer, you need to have previously added billing details in the customer profile.

Billing and Shipping – If you change the billing and shipping information after selecting a client and clicking on the edit icon, this will be changed for the estimate, but in the customer profile, the information will remain the same, and there won’t be any changes in the invoice.

Number – The number is automatically populated (e.g., 001, and the next will be 002). This number is fetched from Setup->Settings->Finance->Estimates – Next Number. The number is auto-incremented, but you can change the next number in Setup->Settings->Finance->Estimates.

Status – By default, the draft status will be selected, and you can change the status anytime you want. Note that when you send the estimate to your customer, the status will be changed automatically to SENT.
Currency – The currency is automatically selected based on your default currency or the currency set for the selected customer in the customer profile. If the currency for this customer is USD, it will be automatically selected and cannot be changed.
Sale Agent – You can select a sales agent for this estimate and then generate reports in Reports -> Sales -> Estimate Report. Note that the sales agent’s full name will be shown on the estimate if, in Setup -> Settings -> Finance -> Estimates -> ‘Show sales agent on estimate’ is set to ‘yes.’
Estimate Add New Item:
You can add estimate items. When adding, make sure to click on the blue check icon for the item to be added. You can also select tax options, as shown in the picture.

The items will be stored separately for each estimate, and changing the item information in Sales -> Items won’t affect the already created estimates with specific items.
Admin note is only for admins/staff members.
Customer note is visible on the client side as well, both in the HTML estimate and PDF estimate.
You can set up terms directly in the estimate, or you can have predefined terms that will be auto-populated. To set up predefined terms and conditions, navigate to Setup -> Settings -> Finance -> Estimate, scroll down, and you can populate the fields as it fits your needs.

Click submit to save the estimate.
While editing/creating an estimate the adjustment option is always available if you want to +- the total amount.
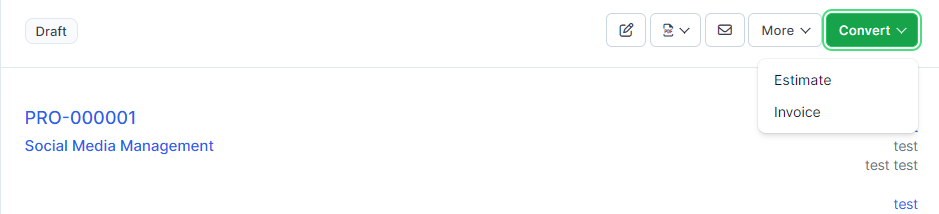
How to convert a proposal to an invoice in the CRM system? #
To convert a proposal to an invoice or estimate, select the proposal from the table, and on the right side, a ‘Convert’ button will be shown.

Click on the button and choose Estimate or Invoice. After you choose, a popup will be shown with the preview info, including the parsed items that are auto-inserted into the estimate/invoice.
When you are satisfied with the result, click ‘Save.’
After converting, the proposal will be automatically marked as accepted (if it is not already marked as Accepted).
If the proposal is related to some lead that is not converted to a client, you will need to convert the lead to a client first and then return here to convert the proposal to an estimate or invoice.
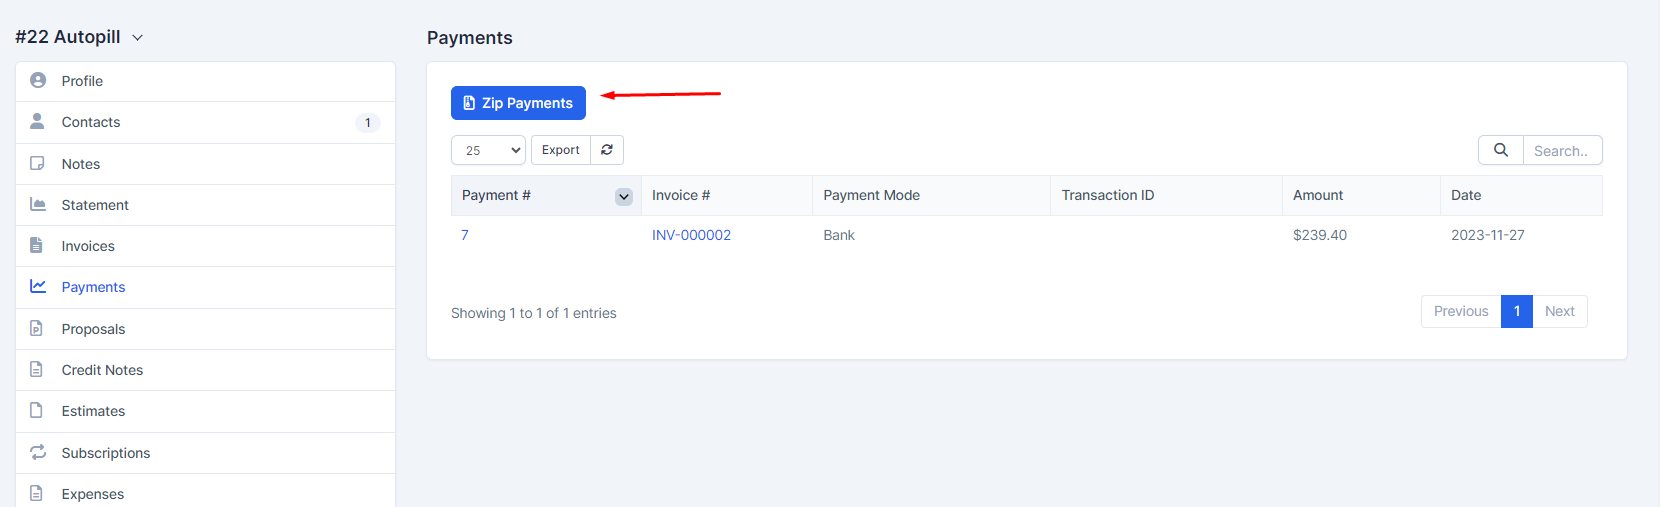
How do you export customer invoices, estimates, and payments to a ZIP file in CRM? #
Go to the customer profile and click on the tab where you want to export data, e.g., invoices.
Select a status or just leave it as ‘All’ and click ‘Submit.’ All invoices based on your selected options will be added to a .zip file.
You can choose a start and end date, the date is based on the invoice/estimate/payment date.